This is a tutorial on how to convert your Logitech C910 or C920 webcam into an HD nightvision camera by removing the Hot Mirror Filter. For the C920 please read the comments. Once you have completed the conversion, your camera will be very sensitive to infrared light. However, it should be noted that one of the main reasons for the IR filter’s existence is to get a sharper image. The quality of the image is thus affected and furthermore your webcam image will have a very strong red tint. (Of course if you would use a lightsource without infrared, such as an LCD, that would not be the case.) Furthermore, in my case the autofocus does not seem to work very well after the conversion. The manual focus on the other hand works just fine, This is all I need for my purpose.
Please note that you are converting the camera at your own risk.
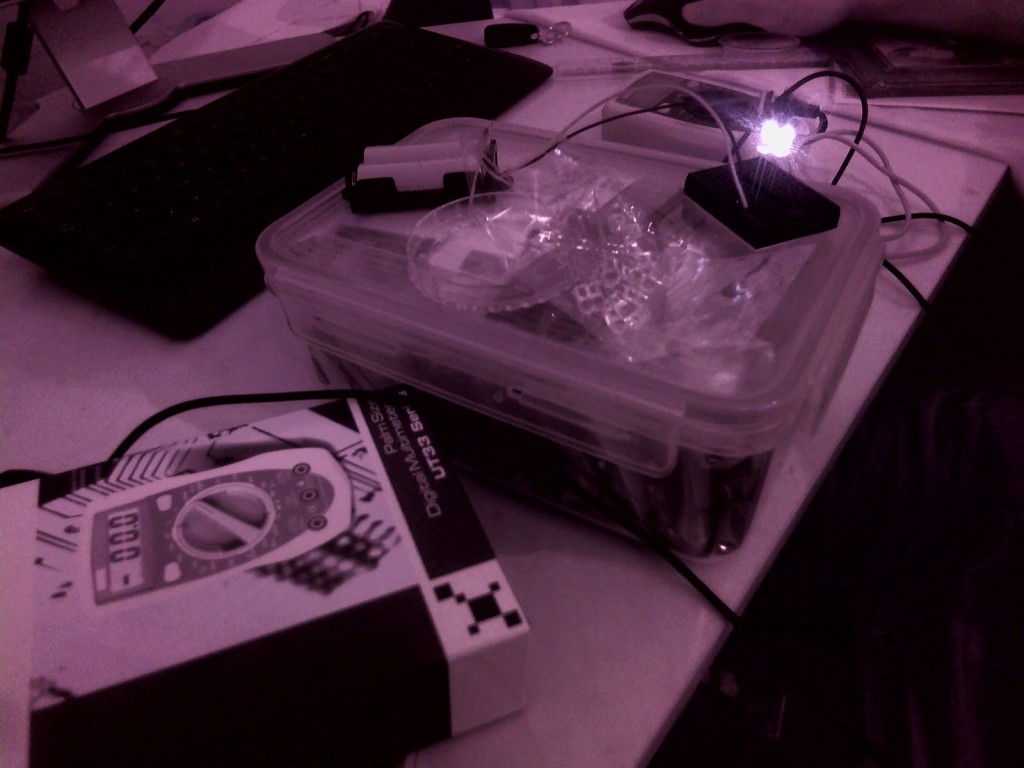
Below you find an image taken with my converted C910. The picture was taken through a 850nm IR filter. The LED’s are 950nm. Looking through the filter the room appears absolutely pitch black to the naked eye.
Let’s get started.
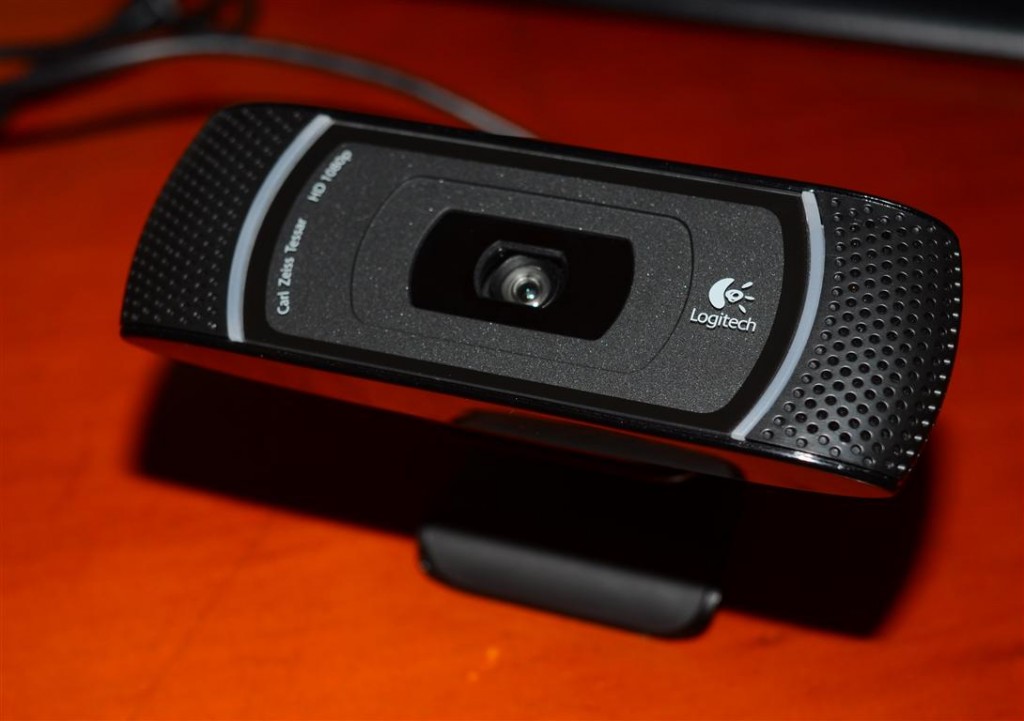
1. Get the camera, some small screwdrivers and a needle.
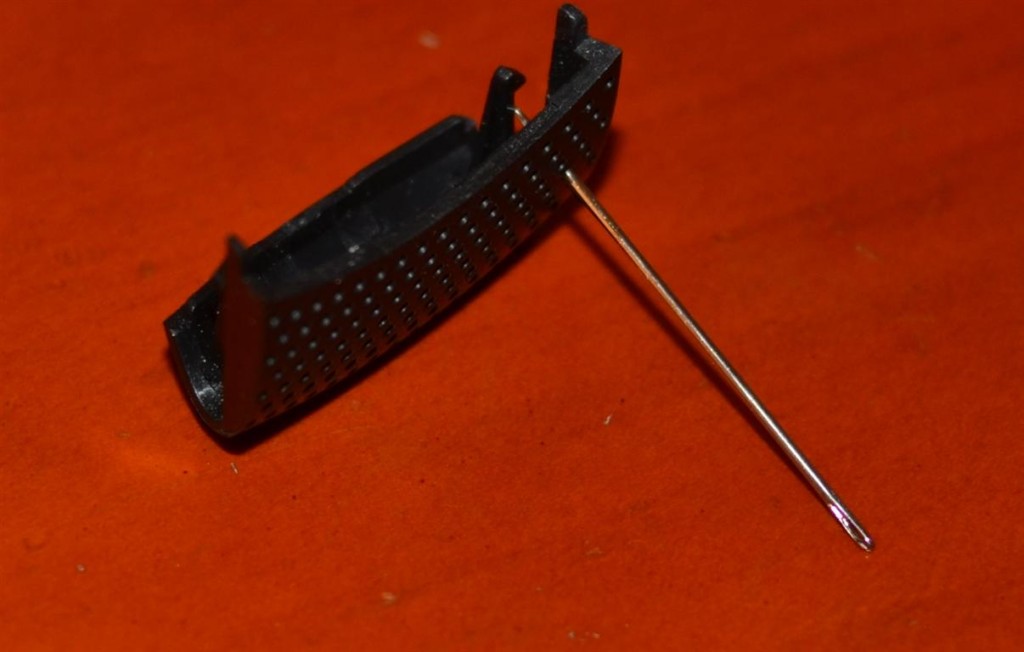
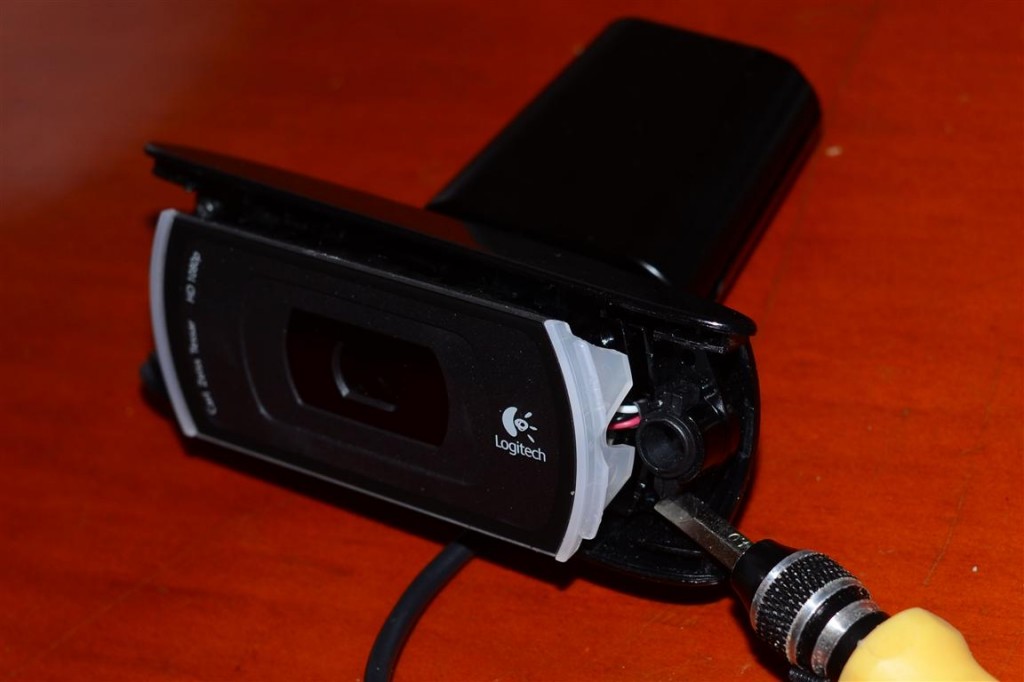
With a needle unclip the microphone guards. You have to move the clips seen below inwards to be able to pull them off sideways.
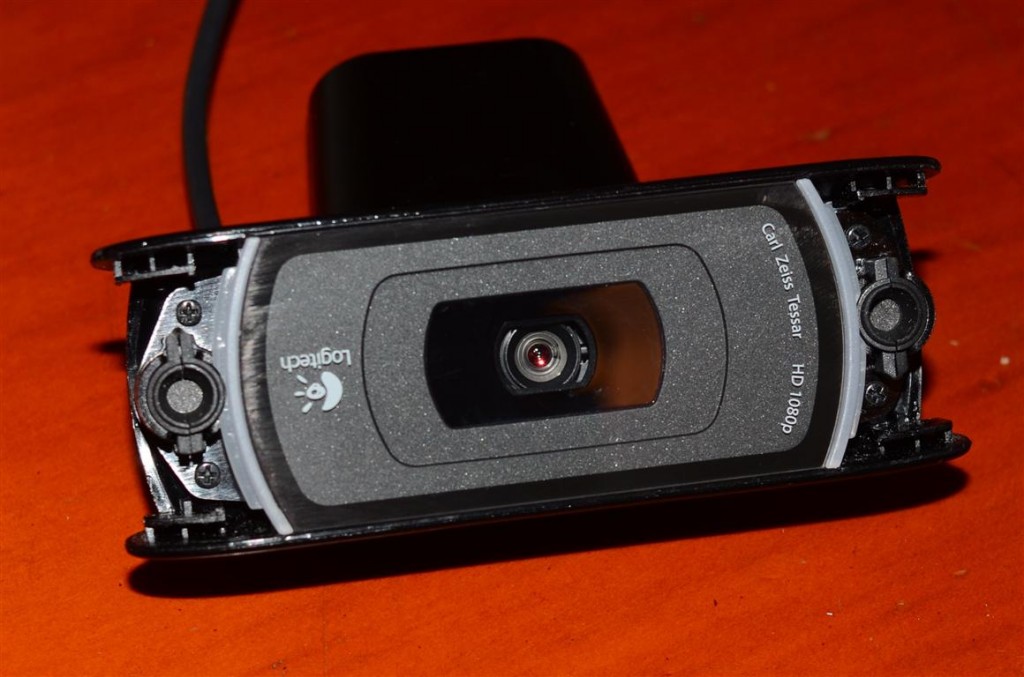
3. That’s how the camera looks without the microphone guards on.
4. Remove the glass by using a screwdriver as a lever. Loosen all four edges…
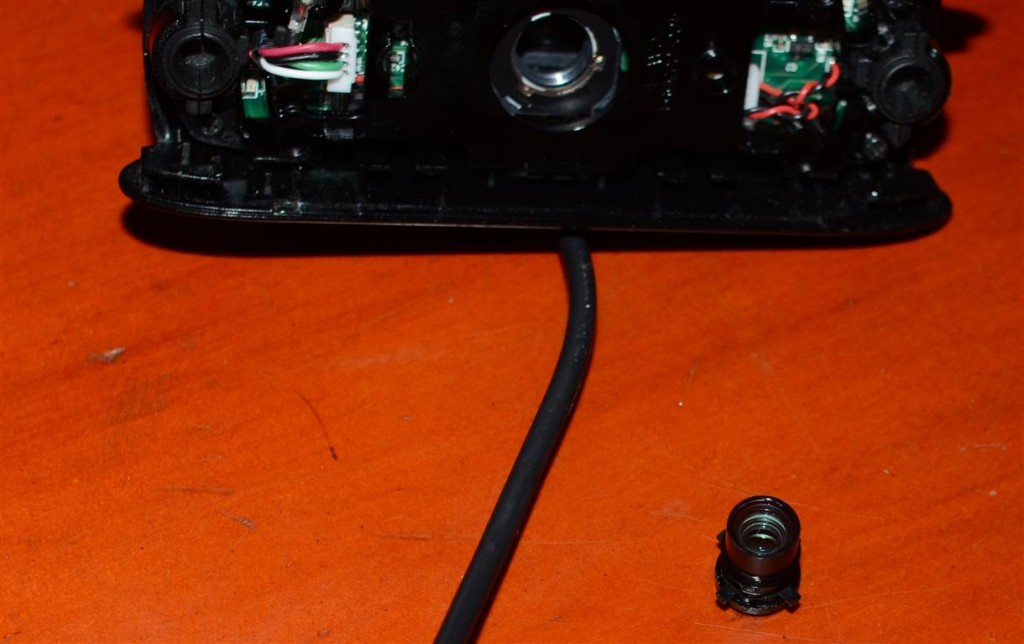
5. Remove the lens by turning it anticlockwise. Please inspect the lens closely before you remove it and make sure you remember the exact position it was in.
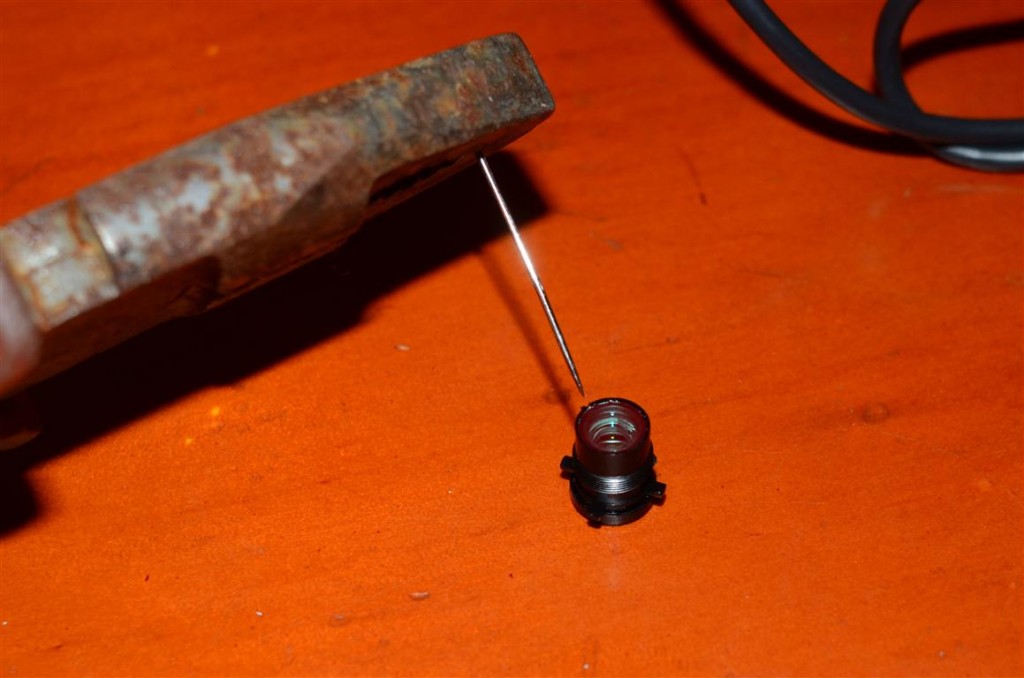
6. Turn the lens around and on the back of it is the Hot Mirror Filter. With a needle you can squeeze it out.
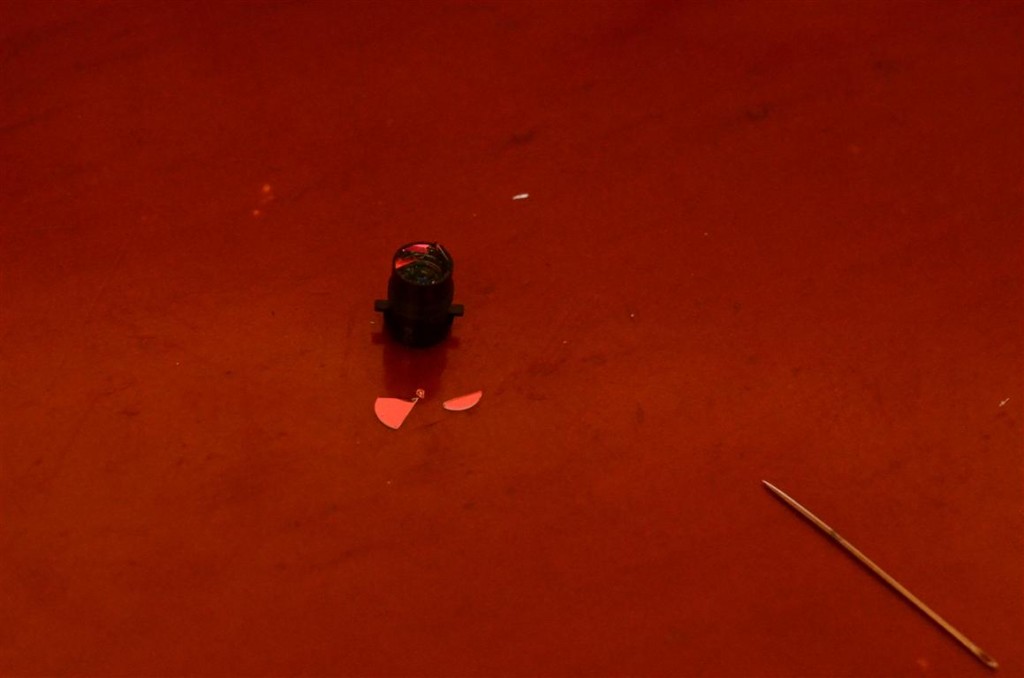
7. In my case the thin IR reflective filter broke. It really is quite brittle. After removing it I realized that it was actually glued in. So maybe one could remove it if the lens was preheated with a hairdryer.
After removing the IR filter completely, put the webcam back together in reverse order. When you install the lens back into the camera make sure your focus works properly by manually changing it using the logitech software. Screw the lens in as much as you have to to get the optimal focus range back.
As requested, here are two photos taken with the C910 after the conversion. The first one was taken outside on a rainy day and the second one inside under a halogen spotlight.
Whilst the quality outdoors seems to not have suffered too much, one can clearly see the misrepresentation of colours on the leaves.
Under a halogen spotlight however the infrared sensitivity of the camera becomes appearant. Image quality clearly suffers in this condition. Clearly the lens on the camera is not made for infrared light. resulting in a somewhat ‘misfocused’ image. The distortion and red tint are not present power led’s are used for indoor lighting as they usually do not emmit any infrared light.
That’s it, enjoy your nightvision HD camera.



Thank you so much. I do wish you would post a screenshot of normal lighting during the daytime for us to see what the quality looks like under normal lighting situations.
You’re welcome Ted. Some photos during nromal lighting conditions are certainly needed. I will add them later today. Adrian
Much appreciated.
Is the nightvision quality better when using the 840nm IR filter on the Logitech? Or were you just trying to prove the point that the C910 could truly do nightvision, by putting the filter on? …just curious…
The filter was merely used to prove a point. The aim of the 840nm filter was to show how infraret lighting which is truly invisible to the naked eye, is completely sufficient for the camera. Adrian
Interesting. In natural light it looked great, still, but it’s as if your skin/hand is blurred, or ‘hard to see’ compared to the inorganic things in the same photo. Does your hand look similarly with the 840nm filter on? Or does the filter help clarify your hand/skin? …you don’t need to post another pic, I trust your opinion.
The reason for why in natural light everything appears to be in focus is that in this case the infrared spectrum is not dominating the other frequencies. What you see is called chromatic aberration. With the lens of the camera not being optimized for the IR wavelength at all, you will have IR appear out of focus if an object is in focus with natural light. I will expand on this a bit more tomorrow. It means the lens can not focus over the entire spectrum as it was not designed for that. Adrian
has anybody done this with really a c920 ?
the microphone covers are different and i cannot see any clips under the covers.
to open the c920 one first has to remove the two rubber pads at the bottom of the case. under this are 2 screws on each side. there are also two clips on the upper side of the case, but with a bit of force the covers can be removed.
i heated the lens assembly with a temperatur regulated fan to 140°C and the ir filter could be removed easily in one peace. be careful not to let a glue thread fall back on the inner lens, it is not possible to remove the glue without damaging the very sensitive coating. finally the lens had to be turned in 110° more than before in order to get the ir focused at infinity.
Thanks! So unlike the C910, can the C920 actually focus at infinity without the IR filter in ambient light?
after removing the ir filter and turning in the lens as described, focusing works well, also the autofocus works without any problems, both in sunlight and at night with ir illumination.
(actually i removed the whole quadratic lens housing with a soldering iron and did not remove the inner lens assembly at all, just afterwards marked it and turned it in a little.)
ir pictures at 750+850+950nm look gray and in sunlight everything looks rosy, similar to your “halogen” image.
with a 950nm filter in front of the camera, curcuits from the sensor shine through.
dear,
i tried to do the described operatoins with my C920. I stopped at this situation: http://flic.kr/p/dCermH
I don’t know how to proceed to extract the lens. Should i remove the squared lens holder? How? How did you do with a “soldering iron”?
And, what does it mean “the lens had to be turned in 110° more than before”. Should i force it while turning? How can i measure 110?
thnks
michele
Ok dear,
that was a fact of turning the lens with a bit more of strenght. Now i’ll try to remove the IR filter, but the second answer remains: how to turn “100 degree more”?? Here it’l all plastic stuff, i’m afraid to breach everything if i turn more than allowed.
don’t try to turn it beyond what feels possible, I never managed to get the c910 to focus properly!
i meassuered the optical resolution (separable line pairs at 1m distance) of the ir modified c920 at both halogen and ir illumination, for the different image resolutions, and the two zoom levels for full hd video.
the results are given in percent of the theoretically maximum resolution (precision is around +-1%), figures are “halogen / infrared”:
– image 2mp/6mp/15mp: 97% / 97%,
– image 3mp: 96% / 101%,
– video wide: 89% / 93%,
– video tele: 95% / 97%.
so the best spatial video resolution is obtained at tele zoom and infrared illumination.
Hi, Stu if is possible for you, please put a focused pic of NIR modified C920 picture. I am also about to modify my cam but I want to see how NIR focused picture looks like. Anyone can post a picture. I need to focus objects from maximum 2 inch distance. And Which kind of IR filters you guys are using.
I would also like to ask how did you remove the filter from lens, I also have to remove the filter and replace it with NIR 775-875 NIR band pass filter, so that I maintain auto-focus thing
After removing the rubber pads of the C920 I can’t see any screws… are you sure that there should be some? 🙂 Did you remove the top cover just with some force or did you somehow manage to release the clips?
Ah, found them, had to remove one more layer of something. 😉
Nice tutorial!
I would like to know if I can change focus range to “include” infinity. Because focusing at a distance makes the edges really blurry in the “standard” version.
I assume you are talking about the c910, I never managed to get it fully focused under pure infrared as I couldnt twist the lens any further! It is however possible with the c920 according to stu above.
I have a logitech C920 and I’ve tried to remove the lens by turning anticlockwise but nothing is happenning so far. Is there something additional to do? Thanks for your help.
I believe it should be exactly the same mechanism. I had to pull it slightly and then turn it to get it out in the c910.
I have a B910 which physically is the same as a C910. I don’t want to remove the IR filter at this point but I want to be able to focus at infinity. Can I do this by following your instructions and turning the lens in to focus at infinity with out removing IR filter??
I don’t think you can, I never managed to focus at infinity properly, maybe somebody found out something else…
I’m planning on using the open-source ITU Gaze Tracker software to convert a webcam into a low-cost eye-tracker for controlling the cursor. Some of the hardware setups on the Gaze Group forums involves replacing the original lens and mount/holder of the webcam used with a M12x0.5 thread 16mm Fixed IRIS Lens, and corresponding lens mount (I’m not sure how necessary this is for better accuracy and focus). It also involves removing the IR filter (with your infrared source, the camera uses the reflection of infrared off the eye).
Do you happen to know if the lens mount in a Logitech webcam is screwed on? What size are the two holes on the circuit board that the mount attaches to? This information is for knowing which M12 lens mount can be attached to it. I understand that the resolution can drop after a IR filter removal, so the M12 must help focus and compensate for the resolution loss.
(Perhaps it’s easier to just accept the original lens. Some people don’t change the lens).
Thanks for any info.
Nevermind. I’ll try to see if I can get reasonable accuracy with just the original lens minus the infrared (IR) filter.
I tried eye tracking before with an older Logitech that I converted and it worked quite well. The tough part for me was to find a way to mount the camera close enough to my face without it being in the way or uncomfortable. Furthermore, tracking was much better with some IR diodes and an IR filter to eliminate non IR light.
I see. Thanks for the info.
“close enough to my face”. It was wearable, head-mounted eye-tracking? I’m trying to do remote tracking (camera on desk), unless you actually need the camera closer than I think you do.
I also briefly saw information about the visible light filters. There are some pricier, circle-shaped ones, but I don’t know which ones would best fit with the Logitech HD Pro Webcam C920. You could however apparently just use a piece of exposed film negative, or crossed polarizers to block visible light. I don’t know the easiest way to attach these things to the C920 though.
Fellow IR lovers,
The first c920 I got I removed the IR filter from the back of the lens no problem. The second one I bought I was shocked to discover the filter is not there anymore! After some testing I can say the filter is not on the lens. Most likely it’s on the sensor but I haven’t tried removing it yet. Has anyone run into this and managed to remove the filter? I’m probably going in tomorrow.. wish me luck!
Yes turns out on some c920 models the IR filter is glued to the base of the square encasing where the lens screws on. You have to remove the encasing by taking two screws from behind and unsoldering its two pins to expose the filter. I can send a picture if you want. Thanks for publishing this!
Hi Ramon, I would be interested to see this too. I added an image upload function to the commenting system so you can easily upload a photo. Cheers, Adrian
Here’s the filter at the base of the lens holder…
… and these are the two contacts that must be unsoldered to release after unscrewing from the bottom
salud!
Can that filter be removed in the same way with a heat gun?
Yes, I used a small heat gun to heat it up and vacume gun to remove it. Worked like charm.
I have a C910 and I wonder how the C920 performs under IR conditions. Did anyone of you try if the C920 is more sensitive to IR?
I don’t have a C910, but the sensitivity of the C920s is awesome. When I have an unmodified and IR C920 side-by-side and give them the same brightness, gain, etc settings (except setting the saturation to 0 for IR), and aim them at the woods outside, they both give a nicely exposed image.
This mage is during sunset: https://scontent-b-ams.xx.fbcdn.net/hphotos-xap1/v/t1.0-9/10606176_770599489669939_7240499734662143307_n.jpg?oh=3bd02b98f33381af74b9fe9c4a9f5768&oe=54B8E148
Pingback: Aphes » Logitech C920 Camera specs and IR removal
I’ve been following this thread for weeks and now I’m kinda disappointed that noone decided to share their videos. I would be very interested to see how these modified cameras perform in the night time under IR LED lights. I am thinking of getting a C920 and turn it into a security cam over my driveway. Any help/suggestions?
hey, i’m also trying to get at the IR filter to use this in conjunction with the eyetracker. i removed the lens, alas, before i read all these additional posts and now i am not at all certain that i’ve replaced it in the right place. i’ve tried a few times. will this matter? is it just a matter of trying again a few times if i have difficulty focusing?
any advice?
thanks!
— j
The NUIA eyeCharm: Kinect to eye tracking surpassed its Kickstarter $100,000 goal. I’m not sure how accurate it will be, though.
Just curious, like a poster above, what the dimension is between the two screws that hold on the lens holder. I would like to fit on an M12 lens mount to one of these cameras. Also, if someone knows the dimensions of the original lens holder itself, that could be helpful too.
The decent sensor and fact it does H.264 encoding on board are both selling points for me on this web cam.
I was able to get an M12 mount fitted to an MS LifeCam Cinema, but its not a pretty fit.
I’m curious whether the c920 is more sensitive to certain types of IR light. After removing the IR filter, I rigged up some cheap 850nm illuminators that work ok, but not great.
I’ve read that some cameras work better with certain wavelengths. Is that true here?
Thanks!
Thanks for this web page, it inspired me to open up my C920 and fix the far point focus just by giving the lens a twist with a pair of long-nosed pliers. In case it helps anyone, I’ve put a video showing how to take the C920 front cover off up on to YouTube: http://youtu.be/94lDYZgihT4
Interestingly, after I “fixed” the focus I realised why the engineers at Logitech had set up the focus as they did – it means that when you are sitting in front of the camera at a desk
1/ If the lens is positioned at it’s maximum focus length it reduces the noise of the autofocus motion that is picked up by the microphones
2/ In low light, the software sets the focus point to the far point – it makes sense for this to be not quite on “infinity” because 95% of the time you want it focused at about the position you might be sitting
However, I’m happy with my fix!
I have just pulled my C910 apart completely and removed the filter (I helt the lens with some aligator clips and used the open flame of a lighter(blue part of flame) on the filter just very briefly, heated the glue up nice and it just fell off).
The distance between the screw hols for the lens mount is about 16mm possibly 16.5mm if that helps anyone.
Has anyone had success with using the webcam as a security camera? I’m hoping to hack it and do what has been done here.
Attached below is the type of image I’m hoping to get out of the camera. Anyone know if this is possible?
Hi Amoon
What you have there is a ring-flash. The photo isn’t really any good, with a proper macro lens, a ring flash and a DSLR you can certainly do much better. Having said that, with a ring flash around the webcam, I don’t see why you couldn’t take a photo like this. If it was just for fun I’d get some angel eyes (its an LED ring usually used for cars light system to make them look a bit fancier, cost about 3 dollars on eBay) and have a go with these.
Adrian
I’ve just disassembled a c930e, and can confirm that the IR filter is in the base as in some of the newer c920 models, i.e. will require soldering skills
Has the c930e the same problem with the focus as the C920? I tried holding my -1.25 diopter glasses in front of it, but I couldn’t tell a difference.
Well, for anyone interested, I tried it with my C930e and there is no difference.
I guess it is due to the different lens they use on it (90°). You can improve the sharpness a bit, but not for the whole picture. If the center is sharp, the edges will be very blurry or if you want sharp edges, the center will be blurry.
The stock setting is good enough and provides a good balance of sharpness for distant objects for the center and edges.
Great work on this. A couple of points of interest and a question:
1. In light (no pun int.) of the fact that the auto-focus doesn’t work well anyway would the CCD still work if the two solder points (enabling the auto-focus in the lens housing) were left disconnected (assuming I used an alternate lens and focused it manually)? Or does it depend on completion of that auto-focus circuit?
2. I’m not sure if anyone mentioned this yet but this particular camera (c910) was crippled from the factory with a design-flaw that rendered it unable to auto-focus to infinity.
3. In case your readers are not aware of this: A cheap substitute for your pricey 850nm glass ir-pass filter is to go buy some color 35mm film, literally pull it out of the can to expose it all and then have it processed (be sure to tell them you don’t want prints). What you’ll then have is a roll of negatives that are completely dark (almost black) to your eyes but nearly transparent when viewed through an IR enabled camera. The negative film can be cut and placed in front of your lens to block visible light (maybe two or three layers) or in front of a light source (very hot lights will melt this though) to make an IR illuminator on the cheap!
note: this is not going to give you exactly 850nm but instead will vary from film type to film type and as such will not be adequate for scientific/mission critical use.
I plan on mounting the camera without the lens housing or the outer shell ( just the exposed ccd + its circuitry) inside some ABS plastic pipe with a
oops….
((CONTINUED)) …. lens from an old 35mm camera. I’m not sure how the image quality will be affected by using a lens with big pieces of thick glass. I suspect it will cut some of the IR.
Also in the above post I mis-typed the model #; “c910” should be “c920”
Thanks for a great how-to. Just did this to a Logitech C615. Generally the same procedure, but to open the case you need to pry off the front panel labels each side of the camera lens (they only use double-sided tape) to get to screws to open the case. Unscrewed the lens, removed the filter on the back of the lens (i.e.; broke it away), and put everything back together. Works perfect.
I also added an “exposed 35mm film” IR pass filter (took some time to find old film negatives!) on the front as well. See http://www.diyphotography.net/take_infrared_pictures_with_digital_camera_ir_filter/. Now it ONLY reads IR, even in a normally lit room. Works a treat for the interactive exhibit we’re working on.
Yes that works well, but it degrades the picture quite a bit don’t you think? A small IR pass filter glass will give you much better results! Even better are the narrow pass filters with a matching light source.
Hi there,
Many thanks for sharing this info.
I’m hoping to open up a Logitech C910 webcam too.
I want to loosen the lens a bit (unscrew it slightly) to hopefully get better extreme macro shots from the camera. (Users of other webcams have done this apparently. It’s just like adding macro rings on an SLR camera to increase the distance between the lens and the sensor slightly.)
I can’t get the microphone covers off though.
Please could you give a little more guidance on where I should stick a pin in to release the clips?
Many thanks if you can,
Chris
Hi, if by chance you need to convert C920 camera to fit CS lens, here is good source: http://lukse.lt/uzrasai/2013-07-modifying-logitech-c920-to-for-cs-lenses/
BTW, thank’s for good tutorial disassembling camera!
Somehow picture was not attached in last post.
Hey guys, I am hoping to remove the IR filter of the Logitech c920 and am curious if anyone has had issues with the focus? I removed the IR filter of the ps3 eye camera and the focus was very bad.
I’m also having trouble with focus, both on the Logitech C920 and the PS3Eye. Removing the IR blocker is no problem, but the camera loses focus when I reattach the lens. It seems like the focal length changes when the IR blocker is removed. How can you compensate for this? Do you replace the IR blocker with another lens? Any help is appreciated.
Hey Mark,
I fixed the focus by replacing the IR filter with 1mm plexiglass. I used an exacto knife to replicate the shape of the IR filter that was removed. Hope this helps! And if you’d like to check out some of our tutorials, google Lofaro Lab Robotics Wiki, my team specifically designed POLARIS
Thanks a lot for this amazing thread !
I had removed the IR filter from an older Logitech model and I was wondering if the c920 was similar.
Does anybody know what lenses are good for near-IR and where to get them ?
Hey Mark,
I fixed the focus by replacing the IR filter with 1mm plexiglass. I used an exacto knife to replicate the shape of the IR filter that was removed. Hope this helps! And if you’d like to check out some of our tutorials, google Lofaro Lab Robotics Wiki, my team specifically designed POLARIS
Hi Tiffani,
I really should have read the entire thread before removing the filter and putting it back together as now I am also having trouble with the focus. Where did you source your 1mm plexiglass from and what sort of tolerance do you think is acceptable. The easiest source for me states a tolerance of +/- 0.25mm which seems a lot seeing it is only 1mm thick.
Cheers,
Jason
Hi,
Just removed the IR filter from a c910 and put it back together and still can’t see video in the dark. Any ideas as to what’s wrong?
Do you have an IR light source?
Realized that after the fact that I needed an IR light source…seems obvious but definitely not clearly stated in this “do it yourself guide”.
Are there any suggestions for good compact IR light sources?
Thanks.
=) Yes, you need some light. It depends what you need it for and how long the range needs to be. For a mouse trap or something small, an IR diode connected to a battery with the appropriate resistor will do just fine. In the photo above in my post you can see two such diodes. An alternative is to get an IR floodlight on aliexpress for example. Doesn’t cost much and you can see everything in the entire garden with the webcam.
Has anyone tried to remove the entire lens holder as explained Ramon Ismael Medina Bello
January 14, 2013 at 21:40 and then replace it with a different lens like those sold for phones? I am going to try this out for kicks since i had to disassemble the whole thing to remove the IR filter from my C920 anyways. Also I am planning to put on an IR cut filter (950nm) on the camera and am wondering if it would be better to have to before the lens or after. any help is greatly appreciated – great info here.
The image quality will be improved by compensating for the IR filter using a Wratten 2 no 87 filter. I put together 2 filters in order to match the thickness of the IR filter. This is the C920 logitech model.
Thanks for the hint!
I have a question, when I removed the IR Filter and put back the module without any additional filter to test that my theory about camera without IR Filter will produce picture that is purple-colored, I got that the picture is still in normal RGB. Would you please tell me if that is the correct output or not? I would be delighted if anyone would be willing to reply my question. I’m thankful for any help
It depends on the light source. If there is a high infrared amount from the emitting source, like a halogen light, then it becomes more purplish like in the pictures above. If you have LED lights its usually much more in the normal color spectrum as they normally barely emitt any infrared light. Just use a TV remote to test the camera. Turn of the lights and see if you can see the blinking infrared LED when you press a button. If so, then you successfully converted your camera to an infrared camera.